 English
 Deutsch
With the growing number of cyber-attacks and ransomware encrypting data and backup files, companies have no choice but to review their backup plans and implement the 3-2-1 backup strategy.
The 3-2-1 Backup Strategy for full disaster protection
- Employees push the wrong button or delete files by accident
- Software problems corrupt data
- Hardware failures cause total data loss
- Virus and ransomware attacks destroy data or make them inaccessible
- Fire or natural disasters damage the IT-equipment
- Sabotage or theft
How to implement a 3-2-1 backup strategy
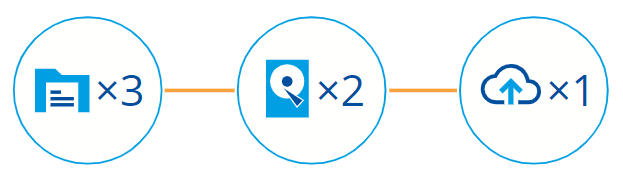
- Create 3 copies of your data
- Store your copies at least on 2 types of storage devices
- Store 1 of these copies offsite
To ensure a full protection against IT disasters, companies should implement the 3-2-1 backup strategy, with one storage device for the primary backup and another one as secondary backup target. If one of them fails, the backup stored on the other storage device is still available to recover your company’s data and system. In addition, a third copy of the backup chains should be stored on a removable storage device.
Is your backup solution including replication to different location / media?
How to replicate to different locations using FTP using free Actiphy ImageCenter
When using the FTP protocol to transfer backup files, all backup files already saved on the secondary backup location are being protected from ransomware attacks on the main site / network. If the secondary storage is located on a safe location, locked (verified access, fire protected, etc…), backup files will be available for restore even in case of important catastrophe.
Use it at your advantage to replicate the following scenario.
- Install the backup software such as ActiveImage Protector and its ImageCenter free replication tool on the system / machine to protect.
- Create a weekly backup job for the entire disk with a full backup once a week and incremental backups every 60 minutes. Backups should be stored on a primary NAS.
- Use the integrated Inline Data Deduplication and Compression feature to reduce your storage costs and to accelerate the transfer of backup images.
- Set “Destination Isolation” option (see below) button to isolate the backup destination for the interval of time between backup creations. It protects backup files from being encrypted by a crypto ransomware attack.
- Set ImageCenter’s replication settings to ”Immediate“.
- Set the replication target
- Option 1: a machine with a FTP server configured.
- Option 2: a secondary NAS using built-in FTP server.
- Option 3: rotating RDX or USB media that you would swap on a daily basis, storing that day’s dormant media in a safe or other safe location. So even in an uncommon disaster scenario, the external media is safe, accessible and backups can be used to restore systems and data. - Set ImageCenter replication to “keep target same as source” to take over the retention policy from ActiveImage Protector to the secondary backup destination.
IMPORTANT: The FTP Server folders must not be visible on the network (no mapped drives). It should only be accessible via FTP!
How to replicate to a datacenter / Cloud at no extra cost with Actiphy ImageCenter
Follow the scenario below as an example to reproduce.
- Install ActiveImage Protector and ImageCenter on the system to protect.
- Create a continuous incremental only backup job for the entire disk with one full backup at the beginning and incremental backups every 60 minutes. Backups should be stored on the primary local NAS.
- Enable deduplication to reduce your storage costs and to accelerate the transfer of backup images.
- Activate the encryption of the backup files with AES 256 and provide a password for it. Therefore, the backup files are not transferred unencrypted over the internet.
- Set ImageCenter’s replication settings to ”Immediate“. The replication target is storage space in the datacenter.
Note: If the original full backup is too large for normal FTP transfer, a manual transfer to the FTP server may be desired. - Configure ImageCenter to consolidate the chain of incremental backup files on the NAS. For optimal performance, the incremental chain should not exceed 300 incremental backups.
- Optional: Should you wish to implement Instant Availability in the datacenter to run system and data in the Cloud within minutes of a major disaster: If set up, this step must be done absolutely before step 8. Install vStandby AIP (or AIP HyperAgent Basic for HyperStandby) on a 64-bit Windows server in the datacentre to create and continuously update a virtual hard disk (VMDK or VHDX) directly on the VMware ESXi or Microsoft Hyper-V host using the replicated incremental backup files. This offers you instant availability of your server in the datacentre: in case of a disaster, you can be up and running in minutes in the Cloud.
- Install a second instance of ImageCenter on the Windows system in the datacentre and configure it to consolidate and verify the incremental backup chain.