 English
 Deutsch
Menu
API preperation
Set up Microsoft 365 archiving & backup
Prepare your Microsoft 365 account for MailVault access
MailVault needs the appropriate credentials and permissions to access information from your Microsoft 365 account.
Registration and Setup Microsoft 365 credentials and permissions
To allow authentication, you first need to register your application at Azure App Registrations.
- Login in Azure Portal, using the credentials of the account for which you need to enable API.
- Select "Azure Active Directory" from the left pane.
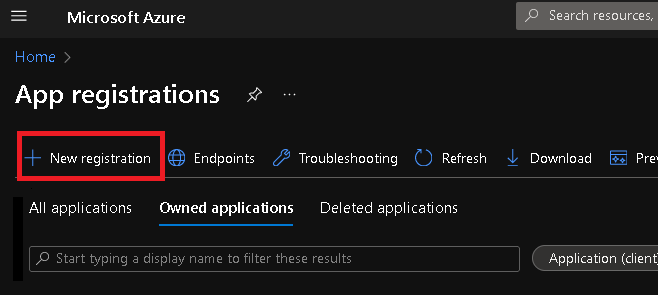
- Select "App registrations".
- Click on "New Registration” and follow the steps below.
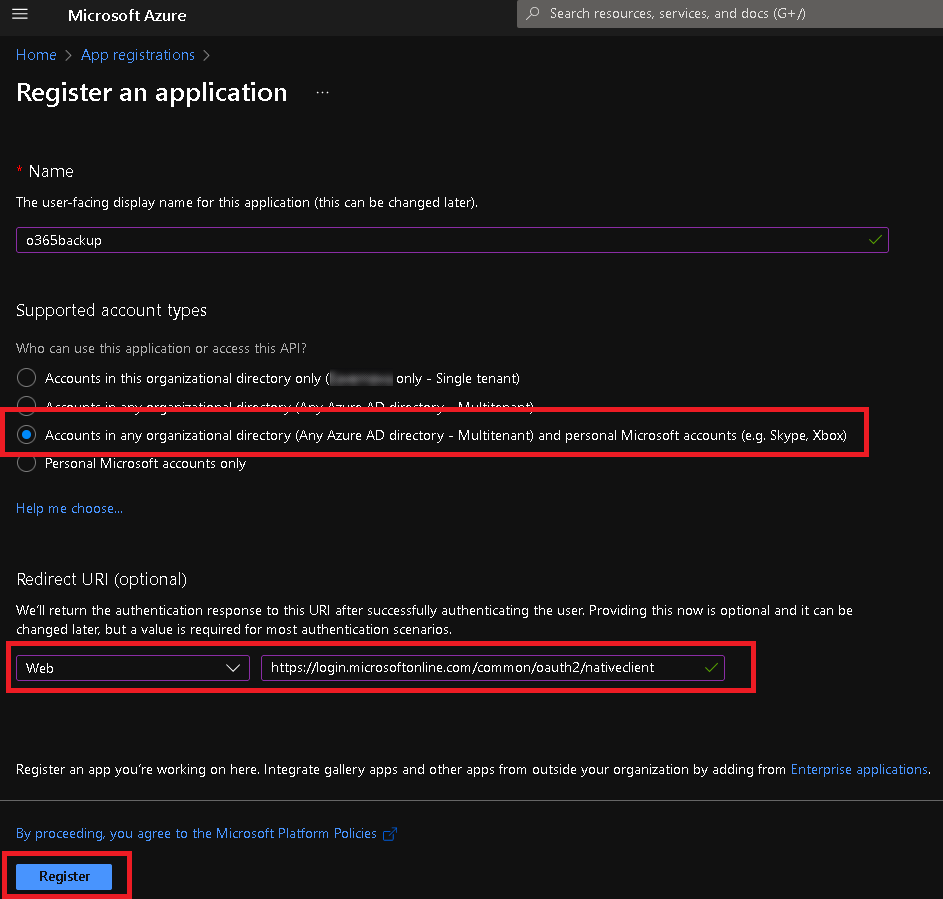
- In Supported account types choose "Accounts in any organizational directory and personal Microsoft accounts".
- Go to "Redirect URL (optional).
- Click under the drop-down field “Select platform” and select "Web".
- Set the redirect URI (Web) to: https://login.microsoftonline.com/common/oauth2/nativeclient
- This needs to be inserted into the "Redirect URI" text box and it’s the default redirect URI used by this library.
- Click on the "Register" button.
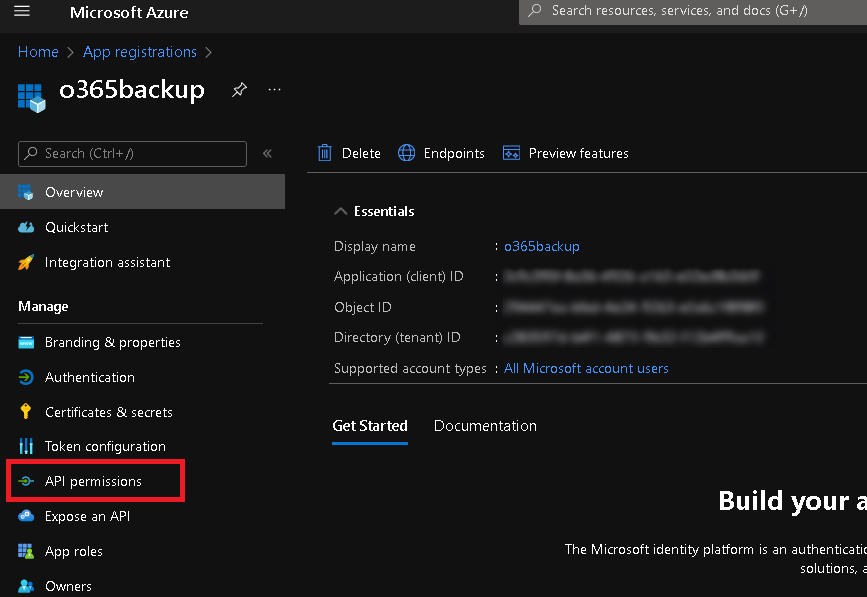
- You will now see the Overview page of the application you have created.
- Click on "API permissions" in the left pane.
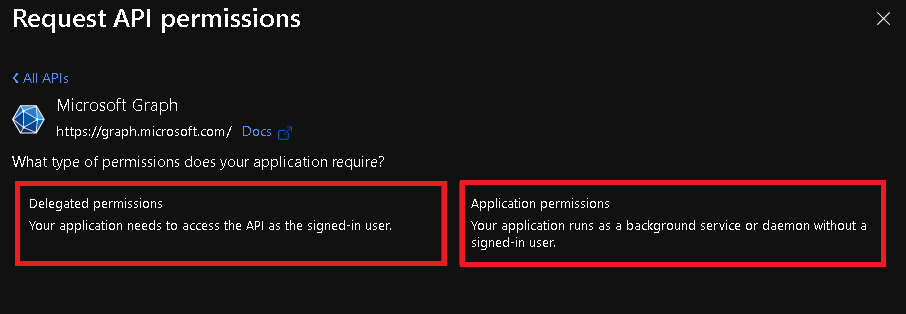
- Click on "Add a permission" and choose "Microsoft Graph".
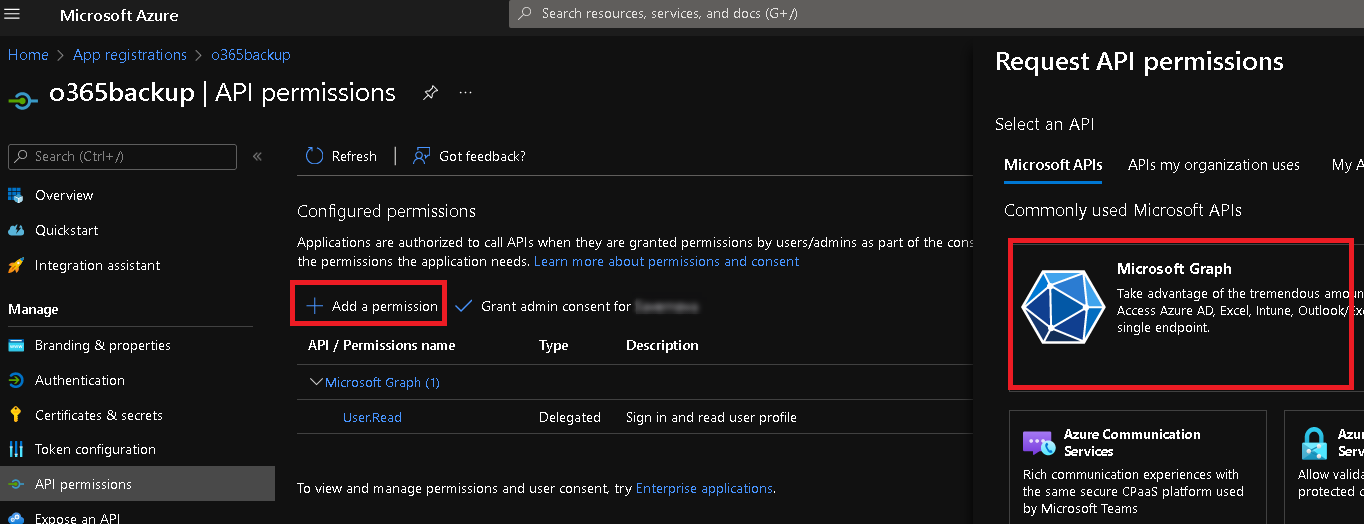
- Click on "Delegated Permissions" and add all options shown in step 16.
- Click on "Application Permissions" and add all options shown in step 16.
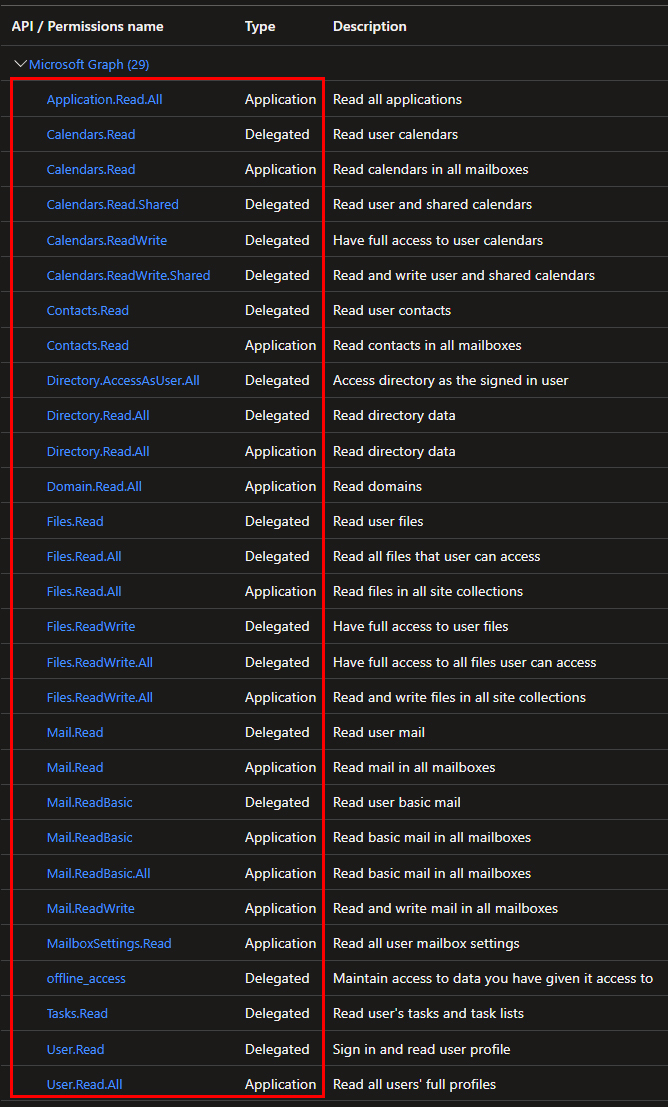
- All required permissions:
- In the API permissions section, click on "Grant admin consent for <your_company_name>".
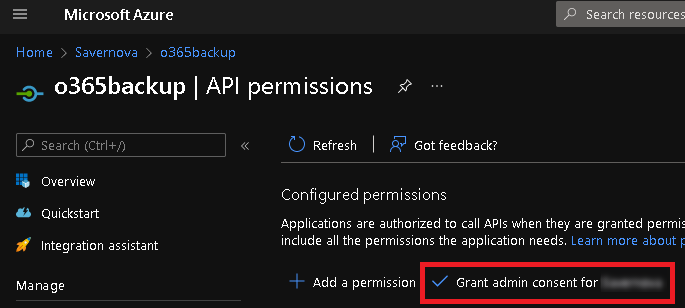
- Click on "Yes" in the pop-up that appears and save.
- Click on "Certificates & secrets" from the left pane.
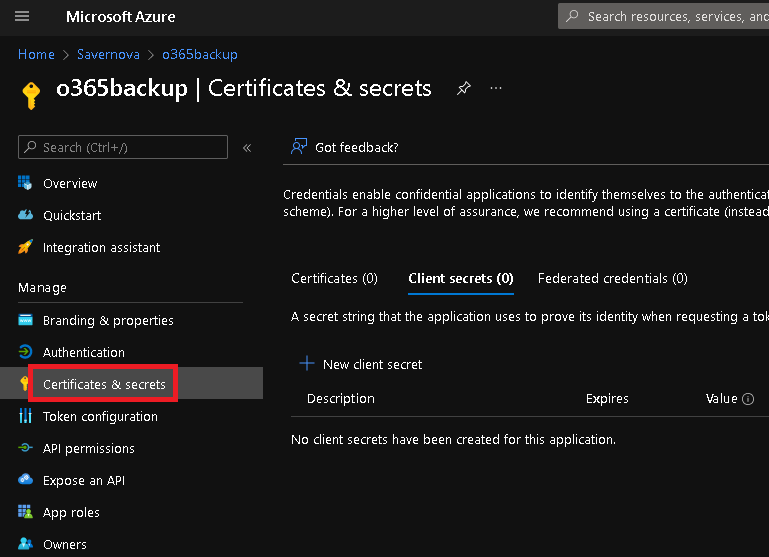
- Click on "New client secret". Set the expiration to 24 months.
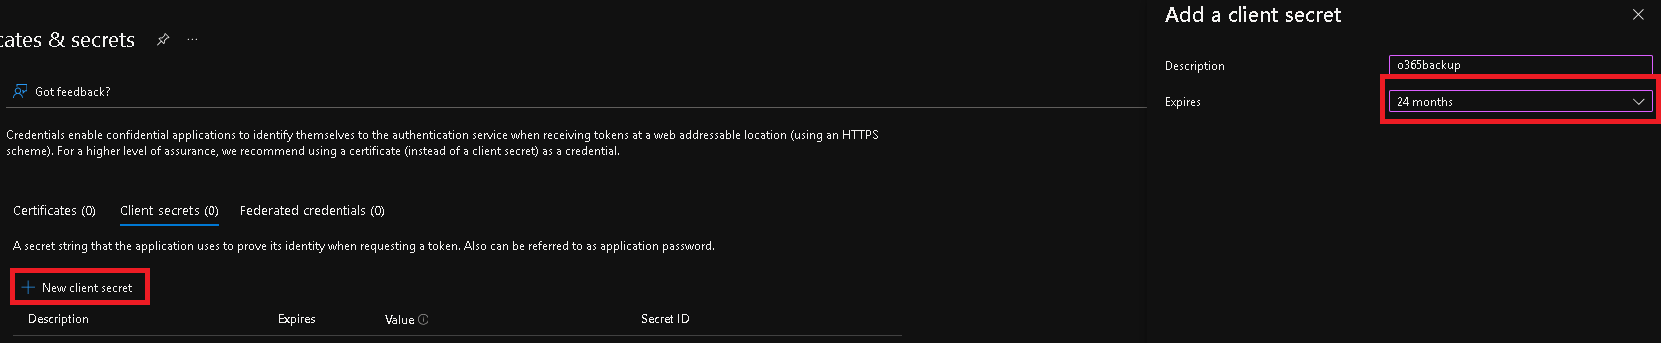
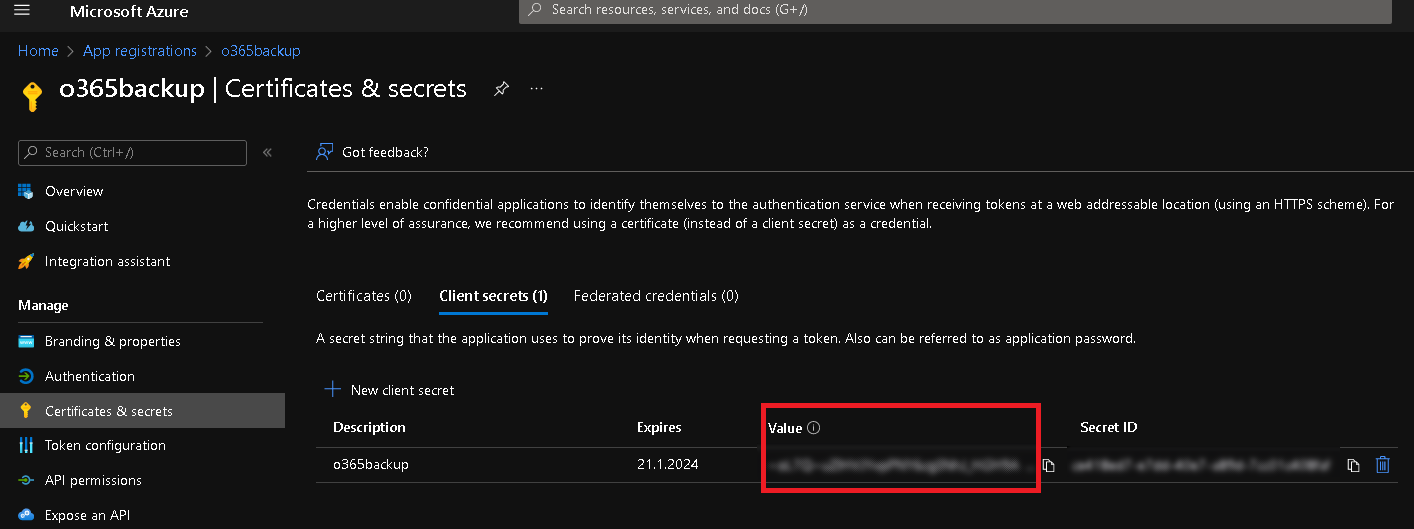
- Important: Write down the value of the client secret created now. It is required going ahead but will not be visible here later
- Now go to the Overview section in the left pane.
- Copy the values of Application (client) ID and Directory (tenant) ID and save them. You will need these values later.
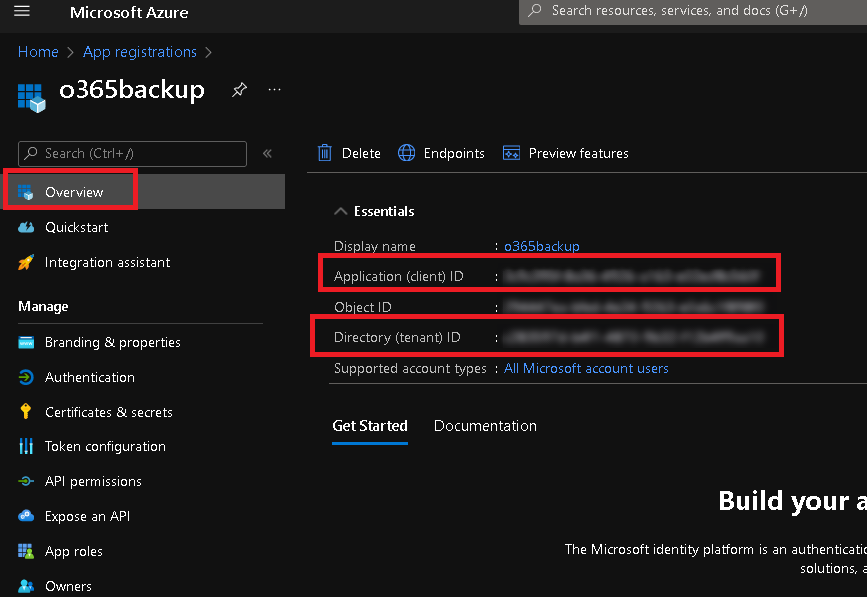
- The service account is created and now able to back up the Microsoft 365 we will require the Application (client) ID, Directory (tenant) ID, and Client secret key (see step 21).